
A Do-it-Yourself Christmas Idea-Herb Gardens-Easy!
Here's a do it yourself Christmas idea that I have used myself in the past with great results. I made them and sold them in my nursery all year long, and they were one of our most popular items...ever! I also made these in hanging baskets for warm weather, if you live in a mild or hot climate you can try these that way too, now. Start now gatheing and choosing the herbs and edibals for this project, I like to use herbs and also lettuces as well, it makes for a great looking pot that is really useful too. I also add minature roses, pansey, and other edibal flowers like nasturtiums and marigolds, for color and vibrance. It also makes a boring salad or meal look incredible! Try it out and even if you don't give it away for Christmas, make one for yourself and enjoy the feast.
***
Things You'll Need
Several Containers
(size and shape depends on your space)
Dirt
Watering Can
A free afternoon
Dirt
Watering Can
A free afternoon
***
Instructions:
STEP 1: Decide on container shape and size, if you have the space you may consider square or round containers about 2-3 ft across (the depth can be useful, less transplanting needed later). If you have only window ledges or balcony ledges then you will want to use the window box style. Material doesn't matter, your budget does ;)
STEP 2: Size is going to matter later so you want to make sure you row things according to size. I do it both by size and color so as to achieve an attractive and tasty project! I will list three categories that work well by size.
STEP 3: Large, these will be your back rows. Rosemary, Sage, Basils, Fennel, Dill, Tarragon, Garlic Chives, and Chives.
STEP 4: Mediums, these will be your middle rows. Cilantro, Parsley, Globe basil (habitually grows in a globe shape on a medium height stem), Caraway, Lavendars, Greek Oregano, Lemon Balm and Mints.
STEP 5: Small and creeping, for your front row. Thymes, Creeping Rosemary, Creeping Oregano.
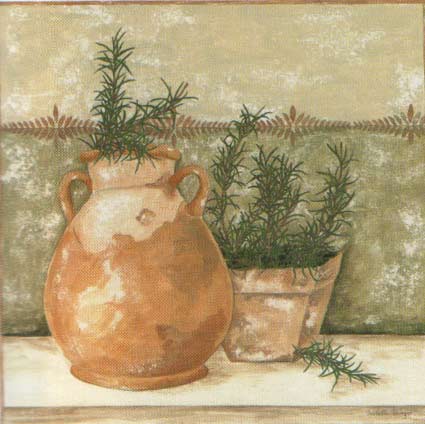
STEP 6: Fennel and Dill tend to be the tallest so you may want to place these in the back and centered. Put one Dill in one pot and one Fennel in the other, back and centered. This is also a nice color and a feathery herb so it stands well as a rear centerpiece. An Upright Rosemary can be a great centerpiece as well, just make sure that is is "Upright" and be patient with it, it will be around for a long time! Make sure if you do the Upright Rosemary to not have it in or near the sage pot.
STEP 7: Basil's come in greens and purples, what I like to do is put a Salad Leaf Basil on one side of the Fennel, a Purple Sage on the other. Put Garlic chives on both sides of these. If you are using a round container, wrap these around the back, if a square, straight across the back. If you are using window boxes, this should be all you put in one. The second container would ideally have the Dill in the back and centered, with a Purple Basil (or Thai Basil) on one side and Tarragon on the other. Flank the Garlic Chives same as container one. The colors and leaf texture are great for the sides.
STEP 8: Choose a container and put Globe Basil or Caraway in front of your Dill then a Parsley or Cilantro in front of the Fennel.
STEP 9: You should have space on the sides of the second row and space on the front row (if you are using window boxes, make row #2 and the front one box, just put the front row to the sides of the first row). In these spaces, creeping herbs look wonderful, and they have space to grow well. I would put Thymes to the sides and work a Creeping Rosemary in the front of one and Creeping Oregeno in the front of the other.
STEP 10: Parsley and Caraway are biennial,(live two seasons, blooming second season only). You will need to plan for them to be replaced, if you don't need parsley seed, plan to replant it next year. Dill, Basil, and Cilantro will reseed itself (annuals, flower one season then die) but most people prefer fresh starts. If you do that at least it gives you a chance to put fresh dirt in. Sage, Rosemary, Oregano, Lavendar and Chives are perennials (overwinter, blooming each season once established) so these will be the permanant spots for them, barring transplanting.
STEP 11: Mints need their own pots, so if you want Mints you need to do this. They will take over a pot quickly, but they don't have to be plain. Two ways to make a nice Mint pot. Spearmint tends to be tall, as well as Catnip (another mint) so they make great center pieces. Lavendar grows well with Mints and is also a nice centerpiece. Lemon Balm is another invasive mint, beautiful and tasty as well. Peppermint is mid height so Lemon Balm and Peppermint would be good for sides, front or circling the taller plants.
Overall Tips & Warnings:
Water often. Plant drought tolerant plants together on one side of the pot, and even consider seperating them with plastic lids cut to size between the root-balls. Herbs in general like to be a little stressed, and will do better not living in a soggy pot. So water when needed and let the pot dry out in-between. My rule of thumb for watering is this: if you see leaf wilt, water! If you can insert a finger into the pot and don't feel dampness after the first knuckle, water.
Also, placing a tray of small pebbles under the pot and allowing water to sit and evaporate will help your herbs stay hydrated and not over watered by sitting in a water filled tray.
Use organic fertilizers. Write me and ask about this one, there are so many you can use, found right in your kitchen!
With insect problems, use organics as well. Again write and ask if you have a question about this issue...too many to list here, but I have great solutions to most if not all pest problems!
Trimming promotes growth, and tastes great too. Basil should never be allowed to seed, it makes it taste bitter.
If you have a slug problem (they love Basil) try plastic lids and cheap beer. At least they pass on happy :)
Plant early in spring in order to get the most out of the season! This project can be done anytime of year, that's why I love it so. If you are planting in a season other than Spring, try buying herb starts instead of seed, they look great right away, and take off better in off seasons. Here's a link to a great herb site:
Possum Creek Herb Farm.
Do NOT place Rosemary and Sage next to each other, the Sage will most likely die. (I have never seen it live!) This is because of the strong oils that plants like, chives, lavendar and sage exude into the surrounding soils.
Do NOT place Rosemary and Sage next to each other, the Sage will most likely die. (I have never seen it live!) This is because of the strong oils that plants like, chives, lavendar and sage exude into the surrounding soils.
***
I hope you enjoy your project! Happy Gardening.
Heather


No comments:
Post a Comment